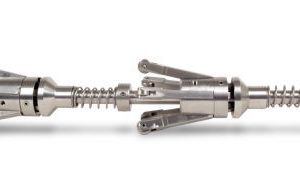
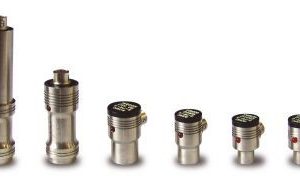
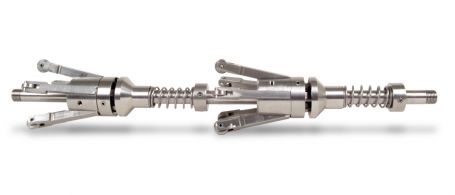
TFB – AttachedThe magnetic flux leakage probes offer a superior high-saturation optimized magnetic design. Changeable wear rings improve wear resistance. These probes are ideal for air-cooler tubing inspection (with aluminum fins) and for circumferential crack detection. |
Features
|
Faster is better – Available for shortest delivery times
The probes listed below are regularly stocked for quick delivery. If the probe you require is not indicated, consult the “Alternate probe diameter” column in the Tube Inspection Probe Catalog to find an alternate probe diameter.
| Part ID | Item Number | Diameter | |
| mm | in. | ||
| TFB-120-N20 | U8280231 | 12 | 0.472 |
| TFB-132-N20 | U8280135 | 13.2 | 0.520 |
| TFB-170-N20 | U8280137 | 17 | 0.669 |
| TFB-179-N20 | U8280111 | 17.9 | 0.705 |
| TFB-187-N20 | U8280246 | 18.7 | 0.736 |
| TFB-198-N20 | U8280361 | 19.8 | 0.780 |
| TFB-242-N20 | U8280099 | 24.2 | 0.953 |
Standard/Custom Probes (Made to Order)
Use the nomenclature and the chart below to configure your part number.

| Probe Type | Probe Diameter (use mm in part ID) | Cable Length | ||
| Part Number Diameter | mm** | in.** | ||
| TFB: Magnetic flux leakage probe | 120* | 12.0 | 0.472 | 20 m (65 ft) 30 m (100 ft) |
| 132* | 13.2 | 0.520 | ||
| 161* | 16.1 | 0.634 | ||
| 170* | 17.0 | 0.669 | ||
| 179 | 17.9 | 0.705 | ||
| 187 | 18.7 | 0.736 | ||
| 198 | 19.8 | 0.780 | ||
| 229 | 22.9 | 0.902 | ||
| 242 | 24.2 | 0.953 | ||
| 283 | 28.3 | 1.114 | ||
| 296 | 29.6 | 1.165 | ||
* Smaller-diameter probes have less sentitivity to external defects, because the probe core section is much smaller than the tube section. However, the sensitivity to internal defects is still very high.
** These probes have an overall diameter that is slightly larger than the part number reference.
MFL Probe Selection Based on Tube Size
High-Saturation MFL Probe (TFB Model) Selection Guide for Common Carbon Steel Tube Sizes
Warning: If your tubes are dirty, a smaller probe might be required for the inspection. Olympus is not responsible if you select a probe that is not compatible with your application. If you require assistance, please contact an Olympus representative.
Example: For a one-inch tube with a wall thickness of 2.41 mm, the required probe would be TFB-187-N20. This probe has an overall diameter of 19.4 mm and changeable hardened steel half-rings.
| Probe ID Diameter – mm (in.) | ||||||||||||||||||||
| Tube Dimensions | 12.0 (0.472) | 13.2 (0.520) | 16.1 (0.634) | 17.0 (0.669) | 17.9 (0.705) | 18.7 (0.736) | 19.8 (0.780) | 22.9 (0.902) | 24.2 (0.953) | 28.3 (1.114) | 29.6 (1.165) | |||||||||
| OD mm (in.) |
BWG | WT mm (in.) |
Overall Diameter (including wear system) – mm (in.) | |||||||||||||||||
| 12.5 to 12.8 (0.49 to 0.50) |
13.7 to 14.0 (0.54 to 0.55) |
16.6 to 16.9 (0.65 to 0.66) |
18 (0.71) |
18.7 (0.73) |
19.4 (0.77) |
20.5 (0.81) |
23.8 (0.94) |
25.1 (0.99) |
29.2 (1.15) |
30.5 (1.20) |
||||||||||
| 19 (0.75) | 16 | 1.65 (0.065) | ● | |||||||||||||||||
| 14 | 2.11 (0.083) | ● | ||||||||||||||||||
| 13 | 2.41 (0.095) | ● | ● | |||||||||||||||||
| 12 | 2.77 (0.109) | ● | ||||||||||||||||||
| 25.4 (1.0) | 16 | 1.65 (0.065) | ● | |||||||||||||||||
| 15 | 1.83 (0.072) | ● | ||||||||||||||||||
| 14 | 2.11 (0.083) | ● | ||||||||||||||||||
| 13 | 2.41 (0.095) | ● | ● | |||||||||||||||||
| 12 | 2.77 (0.109) | ● | ||||||||||||||||||
| 11 | 3.05 (0.12) | ● | ||||||||||||||||||
| 10 | 3.40 (0.134) | ● | ● | |||||||||||||||||
| 9 | 3.76 (0.148) | ● | ||||||||||||||||||
| 31.75 (1.25) | 13 | 2.41 (0.095) | ● | |||||||||||||||||
| 12 | 2.77 (0.109) | ● | ||||||||||||||||||
| 11 | 3.05 (0.12) | ● | ||||||||||||||||||
| 10 | 3.40 (0.134) | ● | ||||||||||||||||||
| 38.1 (1.5) | 12 | 2.77 (0.109) | ● | |||||||||||||||||
| 11 | 3.05 (0.12) | ● | ||||||||||||||||||
| 10 | 3.40 (0.134) | ● | ||||||||||||||||||
| 9 | 3.76 (0.148) | ● | ||||||||||||||||||
| Wear System | Carbide beads (fixed) | Hardened steel half-rings (changeable) | ||||||||||||||||||
● This is the recommended probe size.
● This size can be used if you do not have the recommended size.




Reviews
There are no reviews yet.